Items · Store

Reversible Hufflepuff inspired caplet

With the weather turning, it is time to bundle myself up in a caplet in my favorite house, Hufflepuff. It is made out of black satin and yellow textured upholstery fabric that I had leftover from previous projects. I loved how it came out!


This half circle hooded cape is reversible depending on your mood. The black satin ribbon can be tied in a pretty bow or tied around your back measures 38′ inches long. At the longest point, cape measures 19′ inches from neck to back, and 12′ from neck to front. Hood measures 22′ inches from top to neck.


I am actually selling this piece. If you are interested in purchasing it, visit: this listing.Caplet was made when I owned a cat, but I do not own one at this time. Let me know if you have any questions

Costume · When Cosplay Goes Wrong · Works in progress

When cosplay goes wrong: Marvin the Martian head

sdada

I am sure that we all have been there. Start a major project for your next big convention that you are going to. Pour your heart and soul into this piece four hours, weeks even. Some may even pour a lot of money into the piece. Then you take a step back too admire that item. That is when you realize that all of your hard work over the past few weeks is absolute JUNK.


Your heart sinks. Wonder why you even went down this path to make this item when you could have used something else. You feel like all of the money and time that you put into it is wasted. What do you do now?


After some morning , you brush yourself off and start work on Plan B. Or Plan G, if you are like me.


We all have been there. It is never fun to be in that position and have to start all over. But I believe that part of the magic of cosplaying is that journey that you take to make the costume. The ups and downs along the way to get you to that final piece.

In the spirit of this, I would like to introduce the first post in a series of many. When Cosplay Goes wrong. Today’s edition showcases the beginning process of me making my Marvin the Martian head. And boy, was it bad.

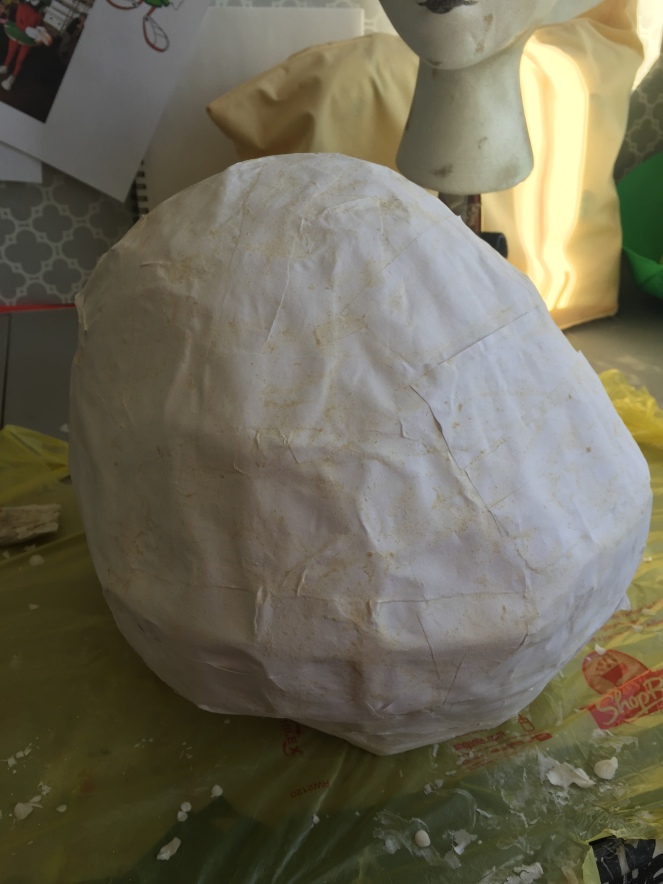
This was round 1 of making the head. I started out with using pipe cleaners for my base buy spacing them out with 1 inch spacers. It started off ok with this method. The shape was exactly how I wanted it and it was light weight.  Then it slowly went down hill when I tired to add the first layer to the base. I was using grafter tape because it was cloth and again, light weight for me. But because I did this, the pipe cleaners didn’t hold their shape. Thinking that this was ok and it would all be better after a layer of paper machete,  I continued on.


IMG_8787

Yep, as you guessed it, it didn’t hold it’s shape. I didn’t realize that this wasn’t going to work out until AFTER I added the second layer of paper machete. It was only until after I left it to dry for three days that I realized I made a gigantic moon rock instead of a helmet. Yep.  This is the point where I said I needed to go back to square one.

IMG_8901

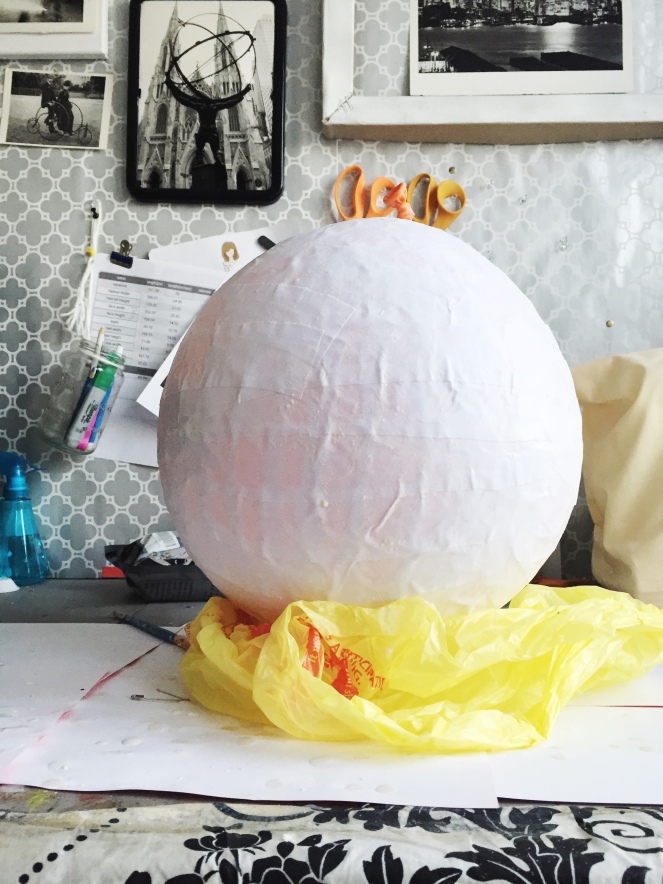
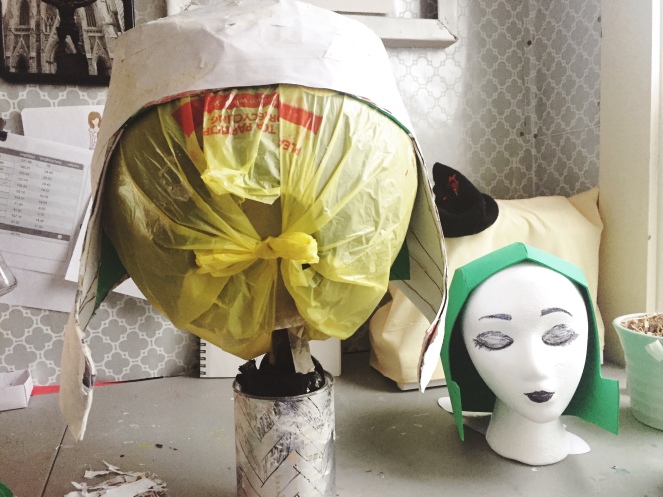
What you see before you is plan c.  Before this, I was trying to use two plastic serving dishes that I got at dollar tree.  It almost worked, but it was just a little too narrow for the shape that I was trying to get. After a while, I just gave up and bought punching balloons that I could use for the shape of the helmet.  This turned out to be the perfect thing to use. Why I didn’t do it in the first place? I can’t tell you why. it just never occurred to me.


IMG_8950IMG_8987

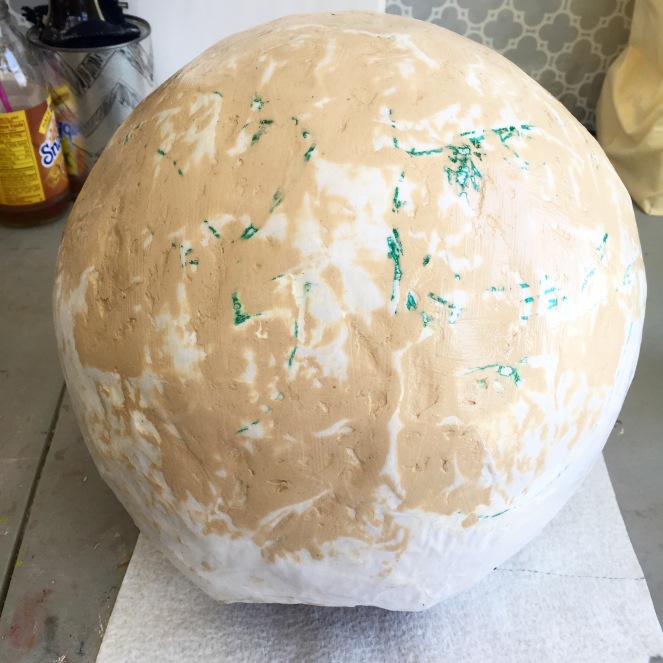
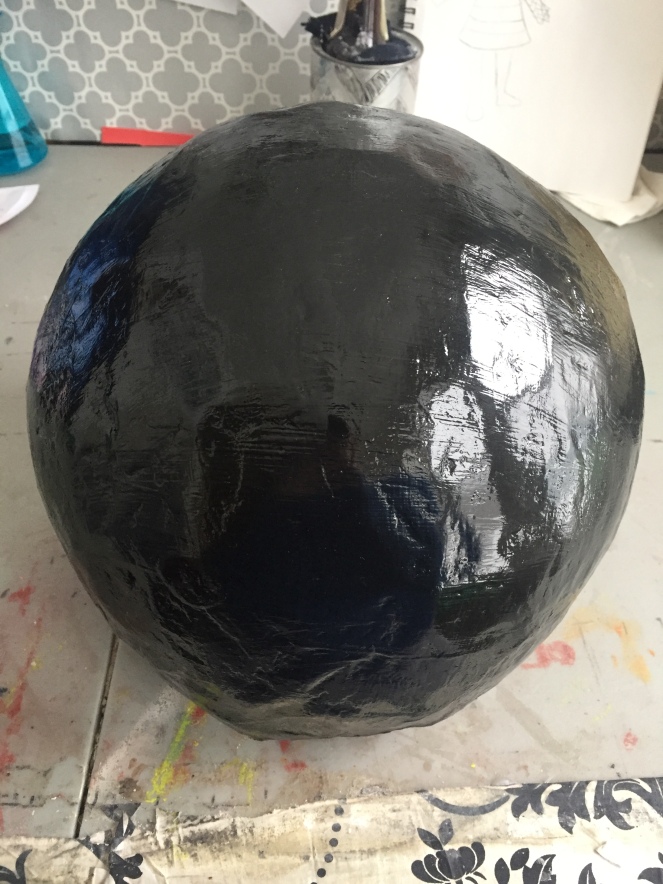
Next came the filler, sanding, and painting. This took forever and a half to do. I was trying to make the surface smooth and shinny, but I did the process wrong. I should have used a better method of paper machete and used plati-dip before I did anything. It’s not the worst thing, but I would defiantly do things differently next time.

Next disaster was the eyes. It took forever to do the eyes. Since this is Marvin’s only way to express him,  I wanted to make sure that this was perfect.  After an hour of two,  and many nagging questions to my boyfriend later, I finally got the result that I was looking for.

That is it for this edition. I am sure that there is going to be many more of these to come in the future. What were some epic costume fails that you had? I would love to hear some of your stories in the comments!

Goals · Personal

May Goals: Pulling it together (or trying to)

Goals.png


So when did it become May? Wasn’t it just like March a few days ago? I don’t know about you, but time has been passing by super quickly!


Here are a few things that I was able to get done this month:

  • Buy all of the things! It is sad but true. Thanks to all of the lovely people in my life, I received some Amazon gift cards.  With this I was able to start buying some of my main items for up coming costumes as well as some much needed supplies. That being said, I still need to buy more. Ugh
  • Wig extensions came off of back order.  I am sure there are a few of you out there that were on that Arda backorder list for forever. I had to buy from them since they carry the matching color to my base. It came to the point that I actually forgot I purchased something. Until….ding! The postman came with my package. Whoo!  Now to sew a million wefts into the wig.
  • Helmets galore.  If my wig isn’t hogging all of the space on my desk then it is the three gigantic helmets that I am making for my sister and I’s Marvin costumes. These things are huge! But I made a major step to in the direction of finishing them. They are all primed and ready to attach the bristles on the top. How am I going to do that? I’ll let you know next month. 😉
IMG_9097
Work in progress helmets. This was before the primer was on.


I have a lot to accomplish this upcoming month. Here is what I hope to pull together:

  • 100% complete helmets. I would like to have everything finished for the helmets that way I can focus on the the rest of the costumer pieces like the hands and shoes.
  • Complete renaissance faire outfit. Late June, I am performing at a local renaissance faire. The show involves me in a mud pit most of the day. Although I am looking forward to it, I don’t want to ruin my nice outfits. I am making a “second class” outfit for the faire that I don’t mind getting dirty.
  • Finish styling Giselle wig. I would love to have my workspace free of all the hair wefts that I have for this wig.  I am determined to have this finished by the end of next week.
  • Plan Tony Viewing Party.  This is one big thing that I want to accomplish well this month. My local theater is hosing a viewing party for the Tony Awards and I agreed to help them plan the event. I have never done this before so I am learning as I go. There is much more to planning an event than I ever thought possible.
IMG_9461
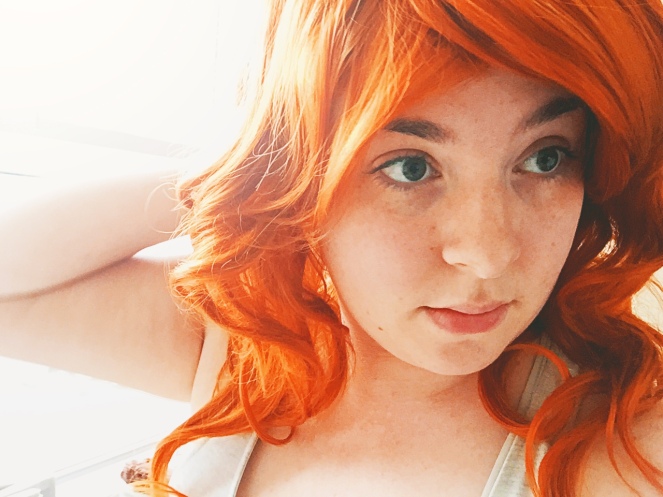
An accidental selfie as I was trying on my base Giselle wig.

As you can see it is going to be a busy month for me, but I wouldn’t have it any other way. What your goals this month?

Convention 101

(Post from old site)

ec6d0-guide

“HOW DO YOU CARRY YOUR BAG?”

Its that time of year folks. The great cons are upon us and not many will make it out unscathed. I, for one, have been that sad person in the corner in the convention that has been hit with many troubles. Some crying may have been involved. Plenty of ripped Seams, sore feet, dehydration, and much more has happened to me over the course of my visits.  There were somethings that I wish I knew a long time ago. Lots of simple rules and etiquette that most people seemed to just “know”.

One thing  I wish I knew then was, “How do I carry my bag of stuff while wearing my costume?” Simple right? But it really baffled me.

The first choice is to try to incorporate your bag it into your costume by making it into a prop. If your character has a animal friend or sidekick, make a plushie backpack of them. Characters with belts can easily have a utility pouch that will carry your essentials. Costumes with pockets are a godsend. I have been known to have my whole purse stuffed into my pockets.

With some characters, you can easily make a bag that matches your outfit. They can be simple bags that you can just be thrown aside for photos.

Here are some of my favorite photos of people and their bags.

Photo Source: EPBOT

I love the gold bag that she made to go along with her costume. It blends right in with the rest of her costume.

Photo Source:Unknown (if anyone knows, please PM me)

What’s in the box you ask? Oh just a few of my things, and Snow White’s heart.

Photo Source: Kinies- Etsy Shop

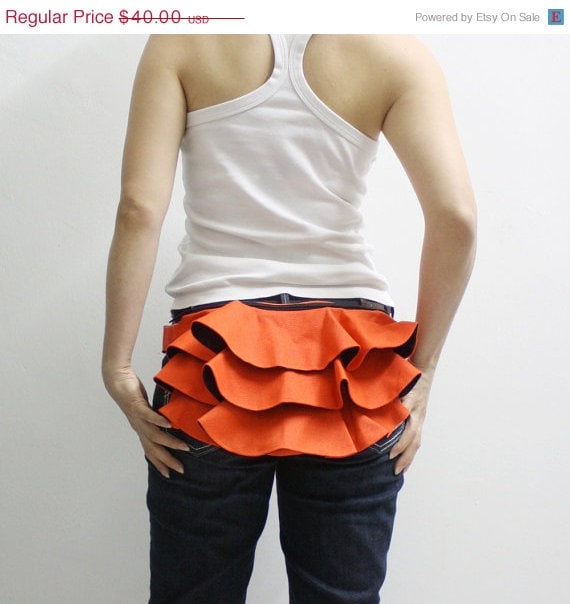
And if your costume is Victorian, why don’t you make your bustle into a fanny pack? Brilliant idea I know!

The other idea requires a very good friend. If there is no way to add a backpack into your costume (like my Anastasia cosplay) ask your friend to carry your things for you. You may need to bribe them with candy to cooperate with you.

When all else fails, just bring a regular backpack. There are no rules saying that your bag HAS to match your costume. Just put the backpack by the photographer’s feet when someone is taking your photo and no one will have proof that you carried around your normal bag.

I hope this helps all you new cosplayers. If there is anything I missed, just let me know in the comments!

Convention 101

What’s in my bag: Convention Edition

(Post from old site)

What’s in my bag: Convention Edition

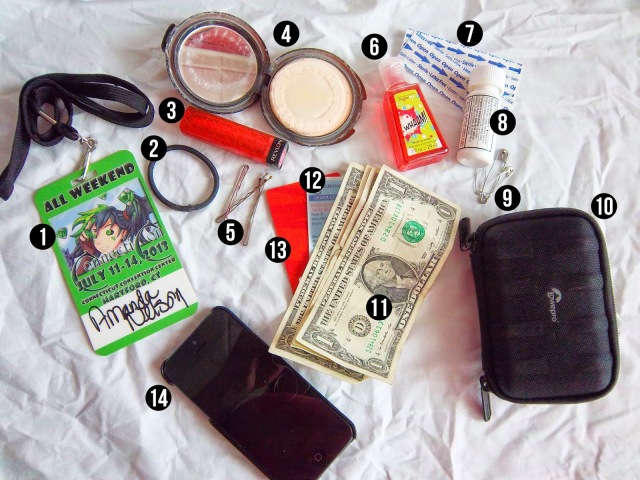
I am kind of addicted to those magazine articles where they show you what is in the bag of Hollywood’s stars. Some of the things that they carry make me think that I should carry that around in my gigantic purse. Today I am going to show you what I normally carry in my bag during conventions. This is the bag that is either incorporated into my costume or carried by my lovely sister. (If you want to know what kind of bag to wear, check out this post).

1. Convention Pass– Pretty basic. You would need to wear this all the time to access most of the convention.

2. Extra hair elastic– Just incase your hair starts to become unruly.

3. Lipstick– You know you will be drinking water and your lipstick will come up. It is nice to touch up.

4. Compact Mirror and powder– So you can actually see yourself when you are touching up your lipstick.

5. Bobbypins– Don’t ask me how I lose all of my bobby pins, but I do. So I always keep extras in case my wig decides to slip.

6. Hand sanitizer– It always nice to have.

7. Band-aids– I am always finding cool pins at the convention. With that, I am always stabbing myself with the pins.

8. Aspirin– Believe me, you will need it.Those Bronies are VERY hyper (in a good way. :p)

9. Safety Pins– I have had to use these to do a quick fix on a costume scene. Now I never leave the hotel without a couple on me.

10. Camera/ Camera Bag– For those awesome moments that you never want to forget. Or do what I do and use the case to carry everything in.

11. Cash– Some vendors don’t take card, so it is always nice to have cash. Just make sure to leave some cash for the parking garage. I found out the hard way that some don’t take card.

12. ID– Just don’t lose it!

13. Credit card– You know you will find that ONE Doctor Who item that you just have to have.

14. Phone– Who doesn’t carry this around anymore.

If my bag happens to be bigger, there are a few more things that I would pack.

Water/Snacks

Bigger first-aid kit

Hand wipes

Deodorant

For those of you who go to cons, what are your must haves for your bag? I would love to know! Leave a message in the comments.

$50 and Under Cosplay · Costume

$50 and Under Cosplay: Mary Poppins

(Previously Posted on my old site)

Mary Poppins

I am sure many of you have seen a version of this cosplay all over Pinterest. Why not? Its from an amazing childhood movie and it looks awesome. Not to mention that I love to bring out the English accent whenever I can. So I bring you my Mary Poppins cosplay for under $50.

White Long sleeve shirt: $0

But you can find one at a thrift store for $7. Preferably get one that buttons all the way up to your neck. In my case, I had to pin mine to make it look like this.

Black skirt: $0

I had this skirt hiding in my closet, but you can find one similar here for $13

Black tights: $0

I always have black tights on hand, but head to your local clothing store for some $10 tights if you don’t own a pair.

Black heels/boots: $0

I had the perfect pair of heeled boots that fit for the costume. Any black shoes will work for this costume.

Red belt: $1

I just visited my local craft store for basic red ribbon. They luckily had one for a buck that was the width I need.

Hat: $6

I made my hat for under $6 (not including glue and things like that). Visit this post to see how I made the hat.

Bowtie:$13

Believe it or not, this was the most expensive part of my costume. I am sure you can find a red bowtie out there ( Thanks to Doctor Who for making them popular). But if you can’t, follow our bowtie tutorial to make your own.

Total:  $20
Without everything I already own:$46

Not bad huh? I was able to pull this together for a last minute costume event that I had that night. Now who wants to go watch Mary Poppins with me?

xo Amanda

Prop · tutorial

DIY- Kronk Prop Pillow

(Previously posted on my old site)

Remember this lovable guy from my last post? Today I am going to show you how to make your own Kronk plushie to take out all your anger on.

Here is what you will need:

•1 yard of plain white fabric

•Pattern( attached)

•Fabric paint in :Red, Yellow, Yellow Orange, Navy, Light Blue,Purple, White, and Black

•Charcoal (or chalk)

•Needle and Thread

•Stuffing/Batting

Tools:

Sewing Machine, Thread, Scissors, fabric chalk or marker, pins, paint brushes

Step 1: Cutting out your fabric

Print and cut out along the dotted lines of the Kronk Pattern. Tape together the pieces together to make the full pattern. Once you have done that, fold your white fabric in half so that you will cut two pieces out at the same time. Pin the FRONT pattern to the fabric with your pins. Then cut the fabric using the pattern edge as a guide. You should have two pieces of fabric.

Step 2: Sewing the Pieces

Remove the pattern from the fabric. Re-pin the pieces together along the edges. Using your sewing machine (or you can hand stitch this) sew along the edge about a half an inch (.5) from the edge starting from the corner of the foot. Make sure you leave the bottom of the pillow open so that you can stuff it.

Turn the pillow right side out to have nice seams. If you are feeling fancy, iron the pillow flat.

Step 3: Transferring the image on to the pillow

Using the FRONT Kronk pattern, trace the black lines in charcoal or chalk. Lie your pattern flat on the table and place the pattern charcoal side down on the fabric. Gently rub across the pattern with your finger to transfer the charcoal. Remove the pattern to see if the transfer came through enough.  If lines are faint, trace in the lines by hand on the pillow.

Repeat process for the back of the pillow using Kronk BACK pattern.

Usinging the color guide on the FRONT pattern, color in the blocks that match the number of the color. Do one color at a time to allow for drying.

Repeat process for the BACK of Kronk.

Step 4:Painting Kronk

Once your paint has dried, it is time to stuff your pillow. Start by stuffing in the top of the head and work your way down. Make sure to get the corners of his shoulders and hands.

Stuff as much or as little you want. I stuffed mine a lot since mine is going to be used as a prop more than a pillow.

Step 5:Stuffing your pillow

It’s time to close up your pillow. Take the raw edges at the bottom and roll them in. Place them together with a sewing pin so that you have a nice hem. Using your needle and thread, do a simple stitch to sew your pillow close.

Step 6: Sewing close your pillow

Now that the pillow is stuffed and close, it is time to go back and touch up your paint.  Most of my touch ups was on the sides where the seams were. I also took this time to go back and add in the black lines and other details of Kronk’s face.

Step 7: The final paint touch-up

There you have it! Your very own Kronk Pillow! I can’t wait to use mine in a costume. Post your photos of your Kronk pillows on the blog! I would love to see how yours turned out.

I can’t wait to see your versions of the project. Post your photos in the comments below so I can see!

Download the files free from MediaFire:
Costume

Lady Loki- From Start to Finish

I do love a challenge when it comes to costuming. This past fall I challenged myself to make a new Renaissance faire outfit with only using things that I currently own. The main reasoning behind this is that I had no money to buy all sorts of fabric. So deep into my stash I go, hunting for anything that goes together in some sort.

Though my hunting I found an old shirt that I had bought many faire’s ago that I just never found the right outfit for. Since I was on a budget, I decided to make an outfit that fit this shirt. Thankfully I had a ton of black fabric scraps to make into a vest to go over this shirt.

As I work, I start to notice something. This out fit is strangely looking like a Norse trickster that loves to cause mischief. And that is when it hit me. I will make a Lady Loki outfit.

Because I have an awesome mom, I had this really cool velvet that I had never used. I was waiting for the right project to come along. And for those who know me, know that I love capes. Boom! The Perfect project.  It seemed too good to be true. Lady Loki was coming together without me really stressing about what to make. It was all meant to be.

Fast forward to the faire a couple of weeks later. I walked around causing mischief. It was there that I happen to meet a fellow faire goer that was dressed as Thor. It was epic! A little while later we meet another Lady Loki. I don’t think the other faire goers knew what to expect.

The best part of this all? I spent a total of  $16 on this costume. I just had to buy a few more glue sticks and gold paint that I had run out of. And I splurged and bought some bracelets to go along with the outfit. I had too! They were too cute!